Well where do I start, at the beginning sounds like a good place. I thought I'd start with one of the smaller bedrooms, thinking that it wouldn't be that big of a job and I'd be able to get it done in a few days (that was 6 months ago at the time of starting this article), turns out this wasn't the best room to start with after all !!
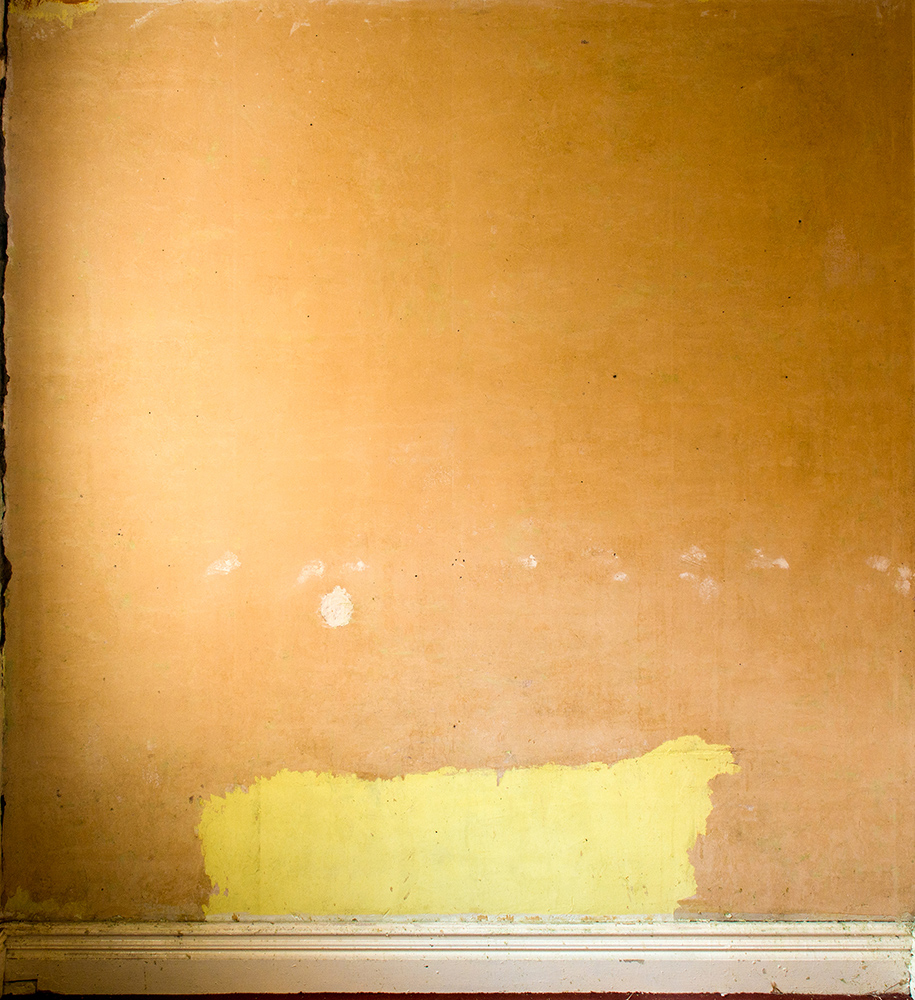
I started out with the back wall, shown in the image to the right, things started well, it was covered in wallpaper which took me about 20 minutes to remove using a steam wallpaper remover, and apart from the yellow patch at the bottom of the wall, the rest of the wall seemed to be in fairly good condition, no signs of loose plaster, a few nail or pin holes but nothing major. Slight damage down the left hand side where for some reason filler seemed to have been used to make a kind of curved join to the wall next to it.
Then I noticed there was backing paper on the wall, well this was a whole other kettle of fish to remove, in some places it came away relatively easily once well steamed, in others it was a monumental struggle to get the paper off, I'd get about an inch of the paper off the wall before encountering a part that was so well glued to the wall it would require 2-3 minutes of constant steaming to get another inch or so off, and this was after scoring the paper in the first place to allow the steam to penetrate as much as possible.
Took the best part of two days to finally remove the backing paper, this didn't bode well for the rest of the room as I was to find out, it also resulted in the upstairs lights tripping the RCD because there was so much steam in the room. Had to remove the light fitting and open windows/doors to dry it out.
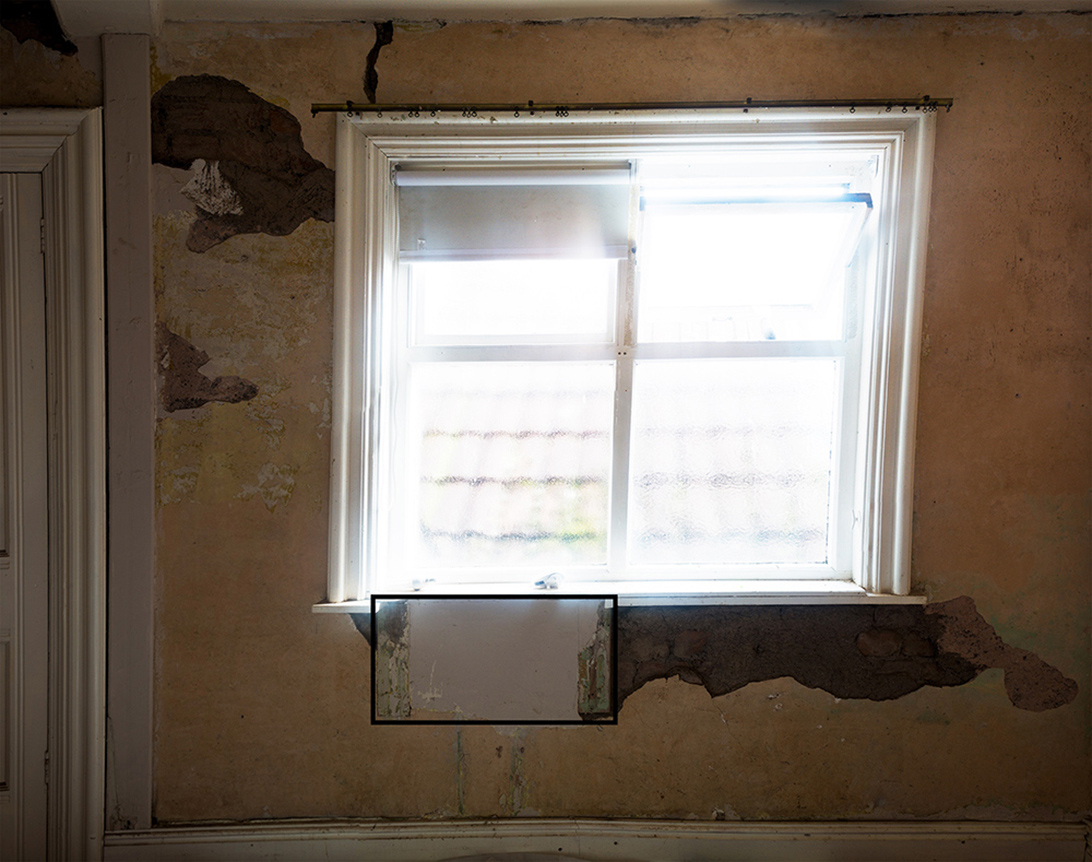
Having gone through the pain of the first wall, well the pain of removing the backing paper, I then moved onto the wall with the only window in it.
This I knew wasn't going to be easy. So I set about removing the backing paper from this wall, there was no wallpaper on the wall just painted backing paper, which I have to say did not come away without a fight, it was like the tough parts of the first wall, i.e. had to score the paper, then steam it for 2-3 minutes just to remove about an inch of the paper, took quite some time to clear the paper, and even though it was November I came out of the room pouring with sweat, because it was hard going and there was a lot of steam in the room. Parts of the wall I simply left as I could tell the plaster was just going to fall off.
The hardest part was just below the windowsill where there are two wooden blocks inserted into the wall as shown by the rectangle in the image to the right, I think there may have been a wash basin attached to them in the past, as part of the windowsill was cut away in the same location. you can click here for a larger view of the blocks. The plaster especially that to the right of the right hand block was very flaky and also bulged out from the wall.
Once I'd completed removing the backing paper, I was then able to remove the plaster, which came away without any resistance, I am pretty sure that the wall has been skimmed at some point in the past, as there was about 1/4 inch of plaster, what was behind it was presumably much older plaster that had bits of wood and hair in it. It was nearly black in colour and very crumbly which is probably the best way to describe it, ohh and very dusty when removed.
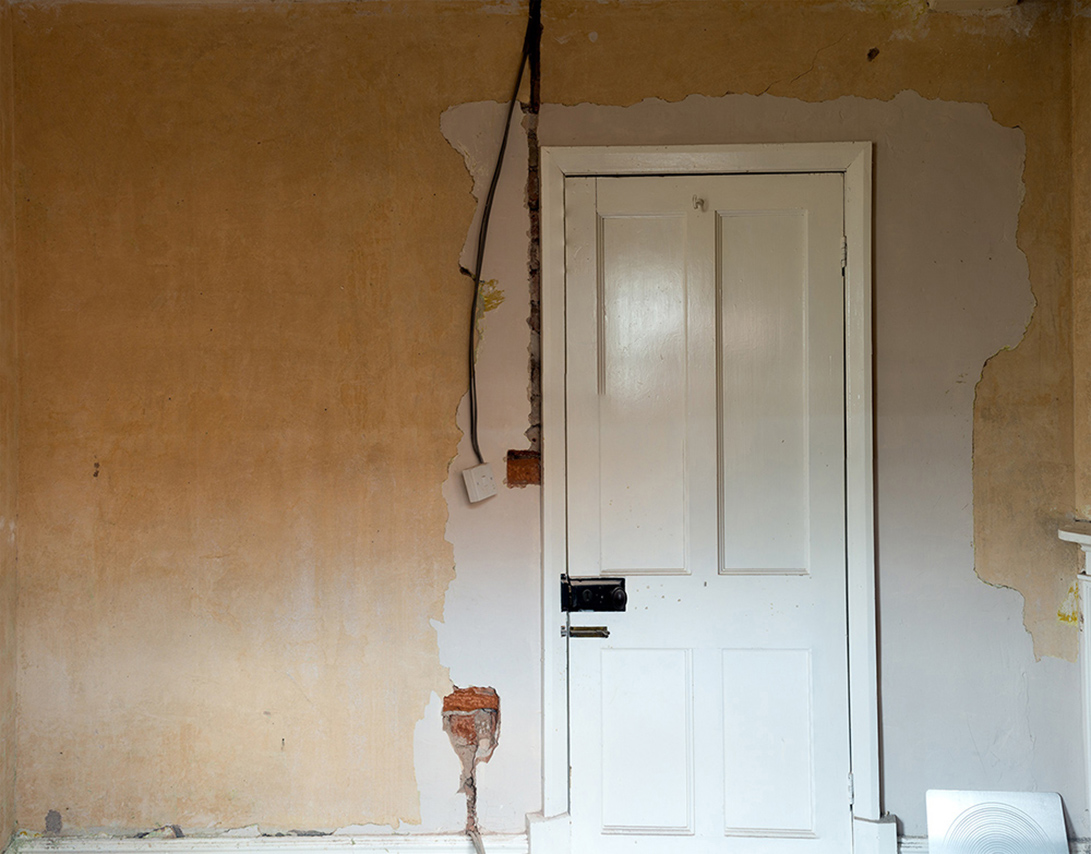
Moving onto the 3rd wall, this was a mixture of relatively easy to remove backing paper, and the very stubborn variety seen on the previous walls. As you can see surrounding the door is plaster in a lovely shade of pink, it's not been applied too well and is quite rough, I am tempted to remove it all, but haven't decided yet exactly what I will do with it.
As can also be seen I have started cutting chases into the wall so that the electrical cables can be buried. I have not wired the house, I am merely burying the cables so they are out of site and the sockets, light switches etc. are flush with the wall, thought this would be relatively easy but no, I'll describe in another section the fun and games I've had getting any depth into the bricks.
This was the last wall, and I must have been on a mission as I stripped the whole wall in one afternoon, now on this one and only occasion in this room, the backing paper came off relatively easily, even in the fiddly places like in between the fireplace and the storage heater. Note the ubiquitous cup of tea (actually it was fruit tea, caffeine sends me loopy, makes me very jittery so I avoid at all costs, but that's another story and not related to renovating our home).
Yes I know what you're thinking, why does the ceiling look like it's made of wooden slats? Well that'll be because the ceiling was being held up by wallpaper, and when I removed the paper the ceiling fell down. That's the problem with these old houses I guess, you never know what surprises are waiting for you :).
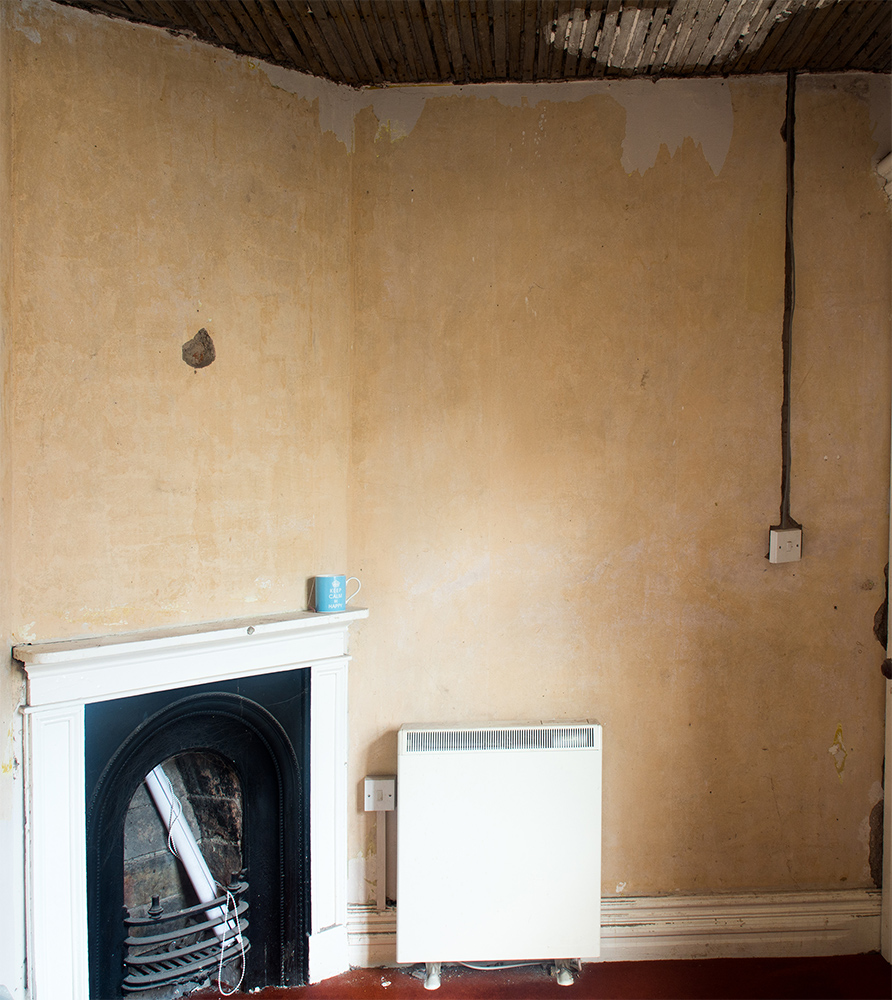
This was the last part of removing loose plaster, or well glued on backing paper, as soon as I removed the wallpaper holding the ceiling up, most of it came crashing down on my head, the white stained area seemed to consist of an inch to an inch and a half of what felt like polyfilla, though who knows what it really was, the rest of the ceiling was of a similar material to the dark powdery plaster that was on the walls. Clearly when it was applied in the past it was literally trowelled on because it permeated the wooden slats, guess plasterboard hadn't been invented at the time.
Made a right mess when I pulled it all down, managed to fill 2 large bin bags with the stuff, fortunately it's not the entire ceiling just a smallish patch, which should be relatively easy to fill with plasterboard and then skimmed to finish.
